Word Doing it with Styles
Table of Contents
Word Styles
Word, doing it with styles. Do you spend ages formatting the text in your Word documents? If that’s a “yes” then the bad news is that you’ve possibly been spending far more time than you need to. The good news is that you can save a huge amount of time doing your formatting if you get into the habit of using Styles. And there are many other benefits, as we shall see…
Applying Styles
All of the text in a Word document is in the Normal style. The format of the Normal style is defined by the document template, usually the Normal template. If you are not used to using styles then you don’t bother with any of this. You just select your text and change its format. That’s fine as far as it goes but you’re not really getting the best out of Word unless you use styles. The fundamental way to format text in Word is to apply a style, particularly where you have headings and subheadings.
Heading Styles
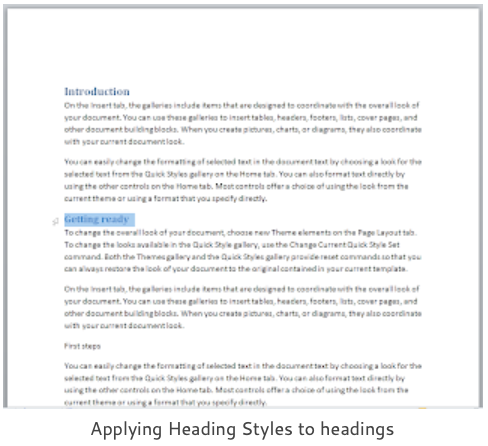
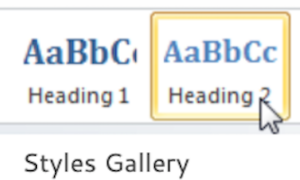
To apply a style to your headings and subheadings, select them one by one and apply a Heading Style from the Styles Gallery on the Home tab.
Use the built-in Heading styles that you can see in the gallery: Heading 1, Heading 2, Heading 3 etc.
Don’t worry if you don’t like the look of your headings because you can always change them later. Not by changing their format but instead by changing the definition of the heading style. Once a style has been applied you can change it as many times as you like. And in as many different ways as you like.
To change the appearance of all the body text in your document you modify the Normal style. To change all the main headings, you modify the Heading 1 style etc.
The built-in heading styles go from Heading 1 to Heading 9 and you can apply them using shortcut keys. The shortcut keys only go from ALT+CTRL+1 for Heading1 to ALT+CTRL+3 for Heading3. Three levels of headings is usually enough for most documents. The key combination CTRL+SHIFT+N to apply Normal style is a good one to know for when you apply a heading style by mistake.
Word formats everything with styles. You can usually see where they have been applied just by looking at the text. There is a very handy document view, Draft View. Many people prefer the Draft View to the usual Print Layout View as it lets them see exactly which style has been applied to each paragraph.
When your styles have been applied you can modify them as you like. If you prefer the appearance of your styles to the standard template styles then you can change the default. Then your text looks exactly as you want it to on every new document.
Draft View
Word’s Draft View is designed to show only the text formatting and gives a simplified view of the layout of the page. You can type and edit swiftly in this view. Most people don’t bother with it and much prefer the standard Print Layout view. The draft view is invaluable when you need to see exactly what’s going on with your styles.

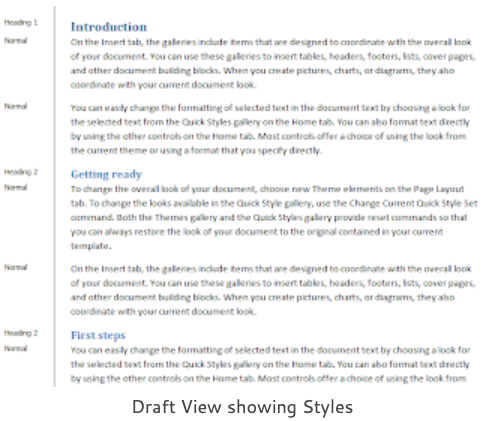
Usually you can tell by the appearance of a heading that you have styled it.
What you can’t see are your mistakes, such as where you have managed to apply Heading 1 to some white space. Or maybe you’re just a control freak. Do you always have that urge within you where to need to know exactly what’s happening?
To show the view, click the Draft control on the View tab. Your style definitions are not normally shown in this view. You must change a Word Options setting in order to see them properly. When you have changed the property, the styles are shown on the left hand side. You only ever have to do this once.
Set the width of the Style Area Pane
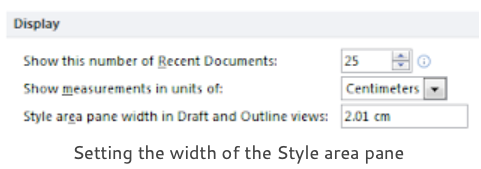
To set the width of the style area pane, click the File tab, Options, Advanced, Display section and locate the Style area pane width in Draft and Outline views: control. Enter a suitable width, around an inch or 2cm is about right.
Modify your Styles
Very few people find the appearance of the built-in styles suitable for their purposes. All you have to do is Modify your built-in styles to get exactly the font, paragraph and other formatting that you want.
Then you can either change the Word defaults so that you never have to do this again. Or create a single Style Set which you can apply to the whole document in one step.
The whole point about styles is that you never actually do any formatting apart from applying a style. When you change the properties of the style then everything with that style in your document gets changed.
Changing the Normal Style
For example, many people like to change the font being used in a document and do this by selecting all the text and then choosing a different font from the font control.
This works fine but paragraphs have over a hundred different properties and if you then wanted to say, change the line spacing as well, you would have to go through the whole selection routine again. And then you change your mind…
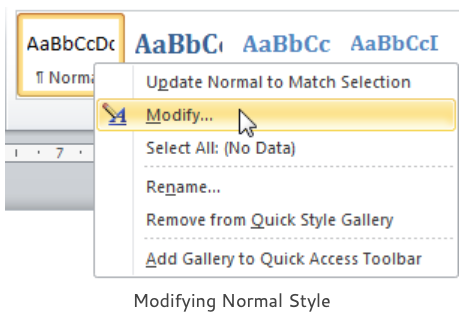
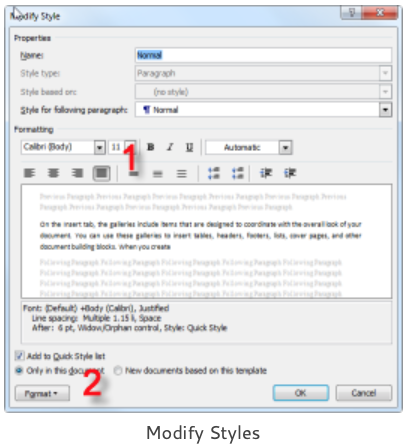
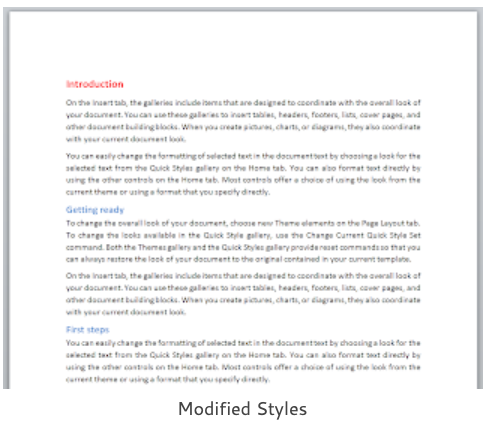
The alternative and much easier method is to modify the Normal style. Right-click Normal style in the Styles gallery on the Home Tab. In the illustration we changed all the body text in the document with a few clicks in the Modify Style dialog. Change the font style, size and justification using the controls in the Formatting section (1). Then click the Format button (2) to change the paragraph formatting.
Changing the Heading Styles
Repeat the same process to change the appearance of the heading styles. Don’t forget to click on the text where the heading style has been applied first before you modify it. There’s nothing more annoying than changing a paragraph of body text to Heading 1.
You don’t like the look of the twenty or so headings in your document? Click on one of them and modify the heading style. The change goes through the entire document.
Or would you prefer to do twenty selections and around another forty formatting clicks to change all your headings? No contest.
Benefits of using Styles
Applying styles ensures speed, consistency and stability in your document. Speed, one change to a style ripples through the document irrespective of how long it is. Consistency, everything formatted with a style complies with the style. Were my main headings 18pt or 16pt? If you have to do them individually then you’re bound to get some of them wrong. Stability, you can not delete an in-built style. Under certain circumstances it may reset to its default values but it’s always there.
Saving your Styles
After all that hard work modifying your styles you will not want to repeat it. If you know exactly what you want for all new documents then change the default. This changes the standard Word document template on which all new documents are based. It does not change documents that you have already created.
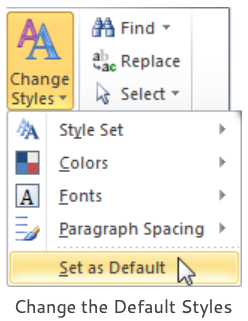
Click the Change Styles control on the Home tab and choose Set as Default. Alternatively, you can create a Style Set which consists of a collection of style definitions. Then you can have your own collection of Style Sets which you can apply to different types of document.
Create a Style Set
To create a Style Set, click the Change Styles control, choose Style Set and Save as Quick Style Set from the fly-out menu. Enter a suitable name for your style set and Word saves it as a template. Whenever you want to apply the style set, click anywhere in your document and choose the style set from the list displayed.
Cleaning Up Existing Documents
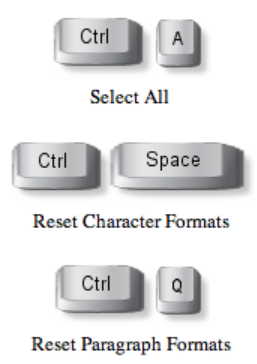
Select all of the text in the document by pressing CTRL+A and then press CTRL+Space to remove any character formatting (colours, fonts, bold, italic etc.) Finally, press CTRL+Q to reset any paragraph formatting (alignment, space after etc.)
Using your Styles
Navigation Pane
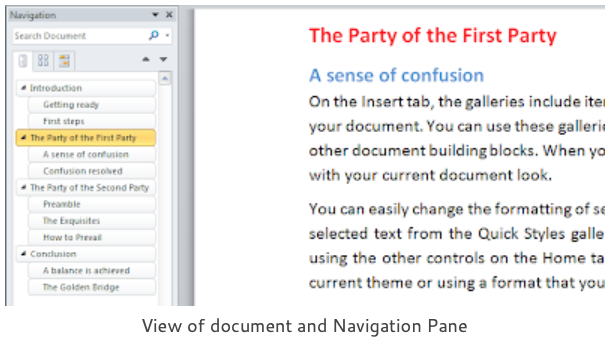
If you’re sick of having to scroll up and down through long documents then you will really appreciate Word’s Navigation Pane which opens on the left hand side of the Word window. It gives you a bird’s-eye view of the headings in your document.
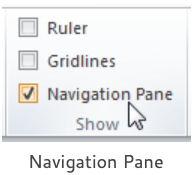
To show the Navigation pane, either click the relevant checkbox in the Show group of the View tab or press the shortcut key CTRL+F. Click the leftmost icon tab in the pane to browse through your headings.
Using the Navigation Pane
Click one of the headings in the Navigation pane and you move to that place in the document. This alone would make me happy but you can also reorganise your work in this pane by dragging and dropping the headings.
The two other tabs in the pane show either thumbnails of each page or Search.
Table of Contents
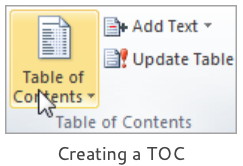
A Table of Contents (informally known as a “TOC”) is a summary list of the contents of your document with numbered page references. It is typically included after the title page. You can easily generate a TOC based on your heading styles, click in your document where you want to insert the TOC and then click the Table of Contents control on the References tab and choose one of the Built-in tables.
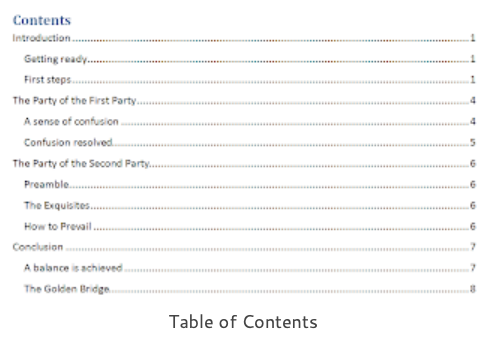
The Table of Contents is a snapshot of the current state of the document. When you update your document don’t forget to update your TOC to reflect the changes you have made. Click anywhere in the TOC, the entire table is selected and shaded (it’s a Word field) then click the Update Table control or press F9.
TOC styles control the appearance of the TOC and you can modify them if you don’t like the look of your TOC. They are available in the Styles Window, to see this window either click the dialog launcher at the lower right of the Styles group of the Home tab or press the keys ALT+CTRL+SHIFT+S. When you can see your TOC styles, right click or click the drop-down arrow on the style. Choose Modify from the shortcut menu.
Hyperlinks and Cross-references
Hyperlinks are those underlined and coloured words that you see in web pages. When you click the link you jump to another page or location. You can insert them into Word documents to jump to a web page, an email address or, more commonly, a Place in This Document.
Creating a Hyperlink
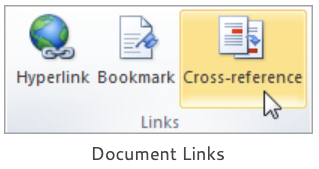
Word Hyperlinks create a convenient navigation structure for anyone reading your document. To create one, click the Hyperlink control in the Links group on the Insert tab. Click Place in This Document and you will see all your headings listed on the right hand side. If you don’t want to link to a heading then you must create a Bookmark first and then link to it. Your Bookmarks will be listed under the headings.
To create a Bookmark select some text in your document and click the Bookmark control. Enter a name for the Bookmark and click the Add button. Bookmarks are place holders in the document, you can’t actually see them unless you choose Options, Advanced, Show Document Content.
Creating a Cross-reference
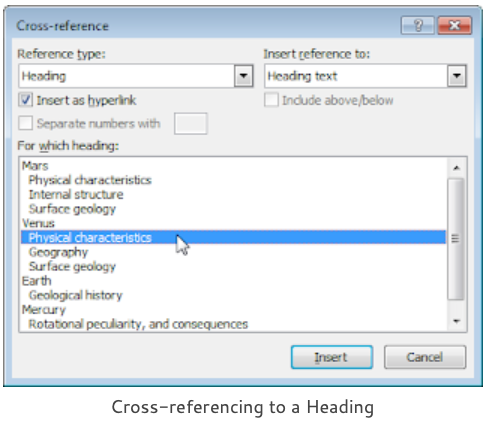
Word can create Cross-references to your headings or bookmarks which can be updated as the document changes. For example, we have some heading text, “Geography” to which we have applied the Heading 2 style and we wish to create a cross-reference that reads like this, “See Geography on page 4“.
Click where you want the cross-reference, type in the word “See” followed by a space. Then click the Cross-reference control.
Choose Heading from the Reference type list and Heading text from the Insert reference to list. Click the Insert button. That gives you the “Geography” bit and it will update should you subsequently change the text of the heading. Finish off the cross-reference by typing ” on page ” and then repeat the process but this time choose Page number from the Insert reference to list.
Updating your References
Whenever you want to update your cross-references and make sure that their information is up to date, select the entire document by pressing CTRL+A and then press function key F9 to update everything.
Paragraph Numbering
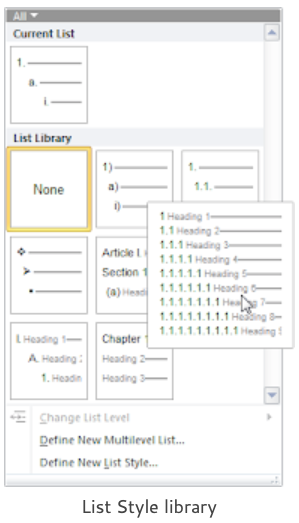
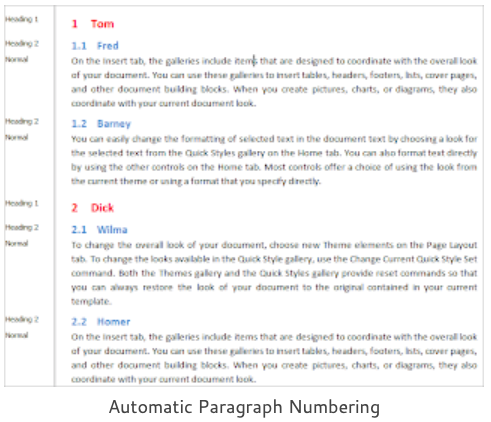
Word heading styles are ideal when you want sequential paragraph numbering in a hierarchy that goes something like this: 1, 1.1, 1.2, 1.3, 2, 2.1, 2.2 etc. What you need is a List Style which will group existing heading styles and relate them to each other. Fortunately, Word contains a library of built-in List Styles which are easily applied and you can also create your own to suit.
Using a List Style
Create your document and apply the various heading styles to your headings as usual. You don’t actually do any numbering yourself, instead you let the heading styles and the List style apply the numbering for you.
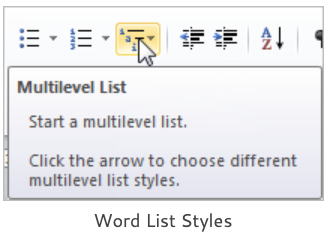
Select all the text in your document by pressing CTRL+A and then click the Multilevel List control in the Paragraph group on the Home tab. Or just click at the start of the document, there’s really no need to select any text once your styles are applied. Browse the List Library and select one of the Lists which are clearly based on the heading styles and Word will number all your paragraphs automatically.
If you can’t find a List Style that works for you then you will have to create your own. This is not the easiest of tasks but it’s the only way if you want something special. Click Define New List Style in the Multilevel List menu.
In the Define New List Style dialog, enter a name for the list then click the Format button and choose Numbering. Click the More button and then link each list level to your heading styles and set the number style and formatting.
Outline View
Word’s Outline View is often neglected. This is a shame as it is the best tool for the job when you are having to manage long documents such as reports, proposals, contracts etc. These documents usually have several sections and require extensive editing and reorganisation before the final version is produced.

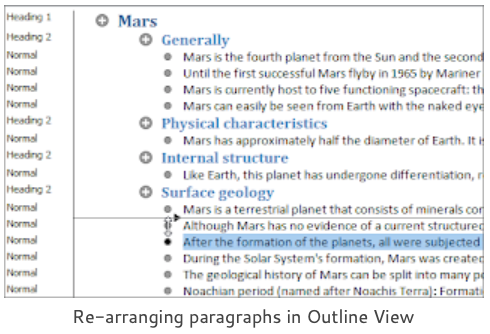
It is now so easy to reorganise your document, all you have to do is drag and drop a heading to move the heading and all its associated subheadings and body text. There’s absolutely no need for all that selection and cutting and pasting work that so many people inflict upon themselves.
When you have set up automatic paragraph numbering you will see that all the numbering updates to comply with the new structure. You can use shortcut keys if you don’t want to drag and drop the headings. Click a heading and then press ALT+SHIFT+Up Arrow or ALT+SHIFT+Down Arrow to move that section up or down in the document.
Creating a PDF file
Word’s built-in heading styles are easily interpreted as PDF bookmarks. One of the most useful additions that you can make to most PDF’s is to create bookmarks for navigation. PDF bookmarks are the clickable objects shown on the left of the Adobe Acrobat window that you use to expand and collapse the headings and show the different levels. Much the same idea as Word’s Navigation pane.
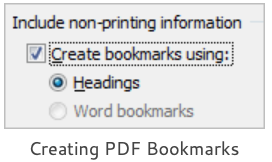
Creating bookmarks manually is a very painful task. But there is no need to bother with that as you can set the built-in headings in your Word file as PDF bookmarks when you save the document as a PDF file. Click the Options button in the Publish as PDF or XPS dialog and check the checkbox Create bookmarks using and the option button Headings.
Doing it with Styles Conclusion
That’s the end of the Word styles propaganda. As we’ve seen, Word formats everything with styles. But it’s not just document formatting where styles can help us get our work done efficiently, there’s quite a few other things a well. If you’ve been using Word for a bit and you’ve not yet tried using styles, give them a go and see if they work for you.
