Excel CTRL Key Tricks
Table of Contents
The Excel CTRL key tricks. That dull, grey-beige looking key that lives an unassuming, lonely life on the edge of your keyboard actually leads an exciting double life in Excel. Now, this is not going to be a life changing experience for you but it may bring a touch of fun into otherwise unexciting everyday tasks. Read on.
Copying and Moving Worksheet Cells
Cut and Paste is most peoples’s favourite method of moving data from one cell to another. A simpler alternative is Drag and Drop; point to any of the cell’s borders, wait for the arrow pointer to display and then drag your data to another cell.
If you want to drag your selection onto another worksheet, drag down to the sheet tabs and then hold down the ALT key to switch over to the other worksheet.
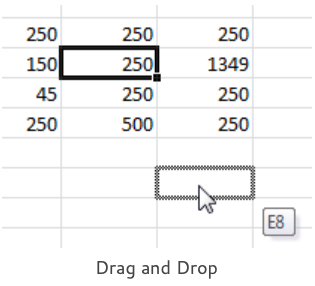
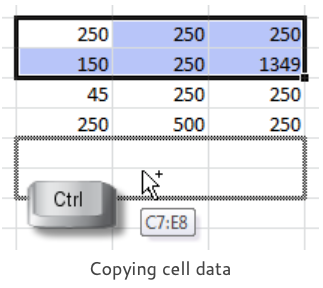
To change your move into a copy (Copy and Paste), hold down the CTRL key as you drag. You should see that a plus sign is displayed next to the arrow pointer. Keep your CTRL key held down until you have released the mouse button.
Cell drag and drop is usually enabled. Should you find that the arrow pointer does not display then you need to turn it on. The settings is in Excel Options (File tab), Advanced section, Editing options: Enable fill handle and cell drag-and-drop.
Copying and Moving Columns and Rows
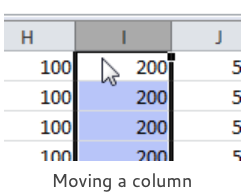
Drag and Drop works in exactly the same way for moving or copying entire columns or rows. Just click the column letter or row number first to select it and then point to the edge of the selection. Drag to move or CTRL+Drag to copy.
Copying and Moving Worksheets
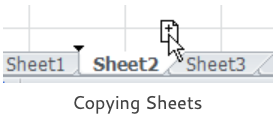
You’ve already figured it out; the drag and drop method is equally effective for copying and moving entire worksheets. Point to the sheet tab and click, the document icon will display. Now drag to the left or right hand side to move the worksheet into a new position in the workbook.


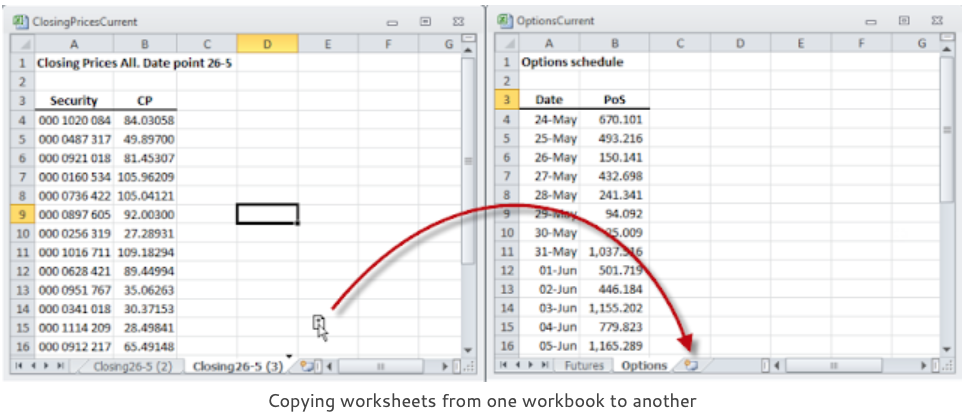
If your worksheets are in different workbooks then you can still drag and drop your worksheets but you need to have both of the workbooks visible first. Arrange the documents on the screen by clicking the View tab, then go to the Window group and click Arrange All, Tiled. Drag to move a worksheet, CTRL+Drag to copy.
Drag and Drop with the Shift Key
Don’t forget the SHIFT key. When you drag and drop one cell onto another you usually overwrite the data in the destination cell or range of cells.
But when you hold down the SHIFT key as you drag then you insert cells into the destination range without overwriting data.
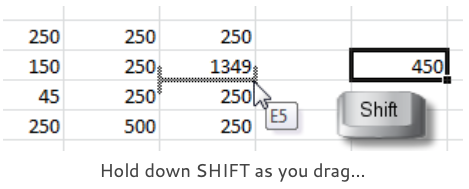
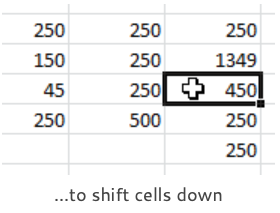
Watch the I-beam as you drag, the vertical I-beam means Shift cells right and the horizontal I-beam means Shift cells down.
In the illustrations we took the 450 cell value over to the right and dragged it into the E5 cell position and the rest of the cell range moved down to accommodate the data insertion.
Filling Data with the Fill handle
The Fill handle is that little black cross-shaped mouse pointer that appears at the lower right corner of the active cell. Not unreasonably, it is popularly known as the “little black cross”. When you drag the Fill handle down or across you fill the data from the active cell across or down: formulas are copied, numbers are copied as constants and text stored in an Custom list, such as days of the week, triggers the list sequence.
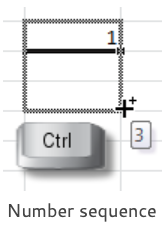
When you hold down the CTRL key as you drag you will see a plus sign displayed on the black cross and this reverses the normal behaviour of the fill. For example, if you drag a cell containing the value of 1 then the number 1 will remain constant but if you hold down the CTRL key then you will generate the sequence of values: 1,2,3,4 etc.
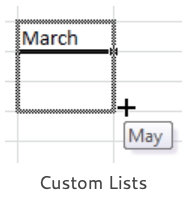
Normal text is copied as a constant but Custom list text is entered in the order of the custom list. Custom lists can be very handy; for example you type “March” into a cell then you drag to enter the other months of the year.
But this can be irritating if you wish the month name to remain constant. This is where you hold down the CTRL key to reverse the usual action. Type in “March” and then CTRL+Drag to copy “March” into the cells below.
Excel Custom lists can be viewed, edited and set up in Options (File tab), Advanced section, scroll down to General and click the Edit Custom Lists control.
Repeating Patterns with the Fill handle
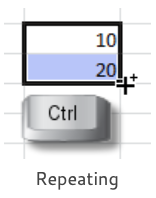
Sequences of numbers may be generated by creating a seed pattern in a few cells and then selecting this seed pattern and dragging to extend the sequence. For example a plus 10 sequence is seeded by typing 10 and 20 into consecutive cells, then you select the two cells and drag to generate the sequence 10,20,30,40,50 etc.
Repetitions of the seed pattern are obtained by holding down the CTRL key as you drag. The sequence of values is then repeated; 10,20,10,20,10,20 etc.
Making Multiple Selections
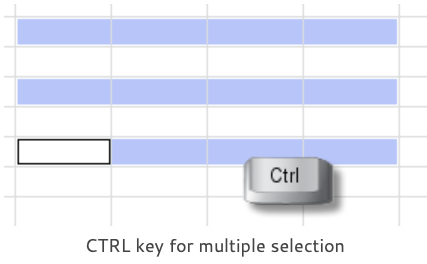
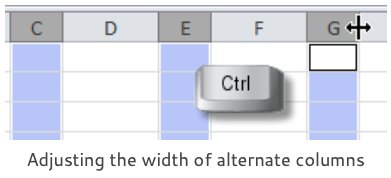
The same method of selection is easily applied to entire columns or rows by clicking the first column letter or row number, then you hold down the CTRL key and click on the others.
With multiple rows selected you can apply actions such as deletion to all the selected rows or with multiple columns selected, as in the illustration, you can change the width of alternate columns in your worksheet. The more you use collections the more ideas you will have. Not all actions can be applied to a multiple selection but it is always worth experimenting.
Now we’ve got the general idea. In the illustration below we coloured alternate sheet tabs red in one go by holding down the CTRL key and clicking on the relevant sheet tabs. Right-click any selected tab to access the Tab Color command.

And the Shift Key again…
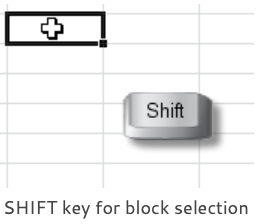
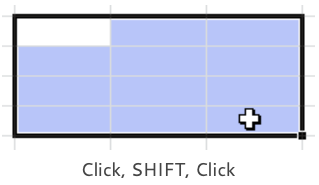
The other method of selection that is useful to know is Block selection which uses the SHIFT key. This is the selection of a continuous range of cells effected not by dragging, as is usual, but by clicking. You click the first cell of your selection, hold down the SHIFT key and then click the last cell. It’s Click, Shift, Click.
This feels very awkward if you never tried it before as you can not stop yourself from dragging but if you practice the technique on small ranges of cells then you will rapidly master it. And then you can apply in so many different situations: selecting huge ranges of cells, ranges of sheet tabs etc.
Now you’re an expert in the dark art of Excel cell selection you will find that you can use these selection techniques on other Excel objects and in other Microsoft Office applications.
Extend Mode
A final word on multiple selection, using your keyboard. The CTRL key with a normal mouse is the easiest thing in the world, you hold the key down with your left hand and select with your right hand. But left-handers don’t always have such an easy time of it and some touch pads can make you wish that you had a third hand. This is where you need Extend Mode with the keyboard.
Press function key F8 to open extend mode and then select your first cell range either using your mouse or by using your keyboard: hold down the SHIFT key and extend the selection by pressing your arrow keys.
Now, lock your current selection by pressing SHIFT+F8 and then move on to make your next selection. This is best done by pressing the arrow keys to exit the current selection and then pressing SHIFT and arrow keys again to make the next selection. Press SHIFT+F8 again to lock this selection and continue in this way until the selection is complete.
I can assure you that this is a lot easier to do than it is to read about it.