Microsoft Office 365 Groups
Table of Contents

What are Office 365 Groups?
Microsoft Office 365 Groups lets you to collaborate with your teammates when writing documents, creating spreadsheets, working on project plans, scheduling meetings and sending email. Office 365 release 2019 is a new service available to 365 and 2019 Outlook users.
Groups lets you choose a set of people that you wish to collaborate with and also set up a collection of resources for them to share. For example; a shared Outlook inbox, a shared calendar or a document library for collaborating on files.
You don’t have to manually assign permissions to all these resources because you automatically give the required permissions when you add members to the group. Any member of the group can use the tools that your group provides. Groups are the new and improved method for what we used to do using distribution lists or shared mailboxes.
Office 365 Groups can be created from:
- Outlook on the web
- Outlook Mobile
- SharePoint
- Planner
- Teams
Which tool you choose to start from depends on what kind of group you’re working with. For example, most will tend to start from Outlook when creating a Group organised around email and calendar. If the Group is for company wide communication you would tend to start with Yammer. For chat-based collaboration start your Group from Microsoft Teams.
Creating Groups
When creating a group where you can collaborate with your teammates you need to decide if you want it to be a private group or a public group. Content in a public group can be seen by anybody in your organisation and anybody in your organisation is able to join the group. Whereas content in a private group can only be seen by the members of the group and people who want to join a private group have to be approved by a group owner.
Neither public groups nor private groups can be seen or accessed by people outside of your organisation unless those people have been specifically invited as guests.
Adding guests to Office 365 Groups
Guest access
Office 365 Groups lets you and your team collaborate with people from outside your organisation by granting them access to group conversations, files, calendar invitations and the group notebook. Access can be granted to a guest—for example, a partner, vendor, supplier, or consultant—by any group owner.
How it works?
People using Office 365 Groups can use Outlook on the web or Outlook for Windows to add and manage guests in their Office 365 groups. Guests can have any email address, and their email account can be a work, personal, or school account.
Note: Guest access is set up by the IT administrator.
- A group owner adds a guest to the group or a guest is nominated by a group member. The group owner approves the nominees.
- The group owner is informed of which content and resources the guest can access within the group. A combination of text and icons gives all group members a clear indication of guest participation.
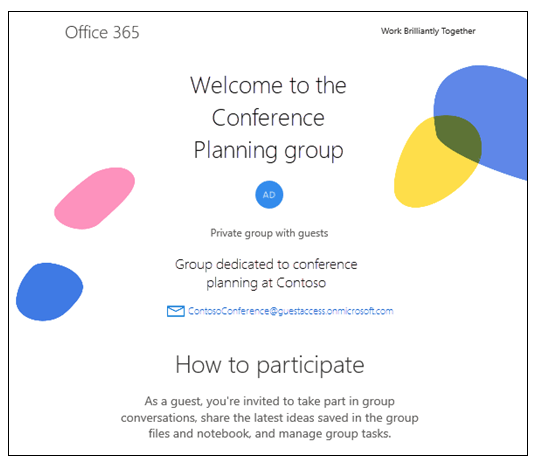
- The guest receives a welcome email and can participate in group conversations, receive and respond to calendar invitations, and access the group files.
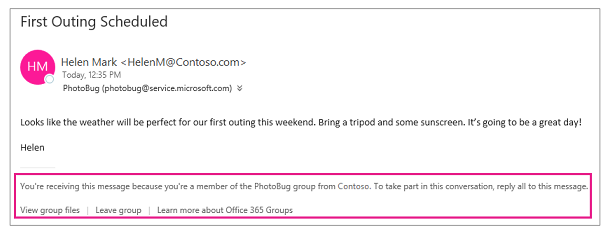
- Guests can leave the group at any time via a link in the footer of all group email messages and calendar invitations.
Admins can manage guests and their access to Office 365 group resources using PowerShell. See Manage guest access in Office 365 Groups for instructions.

The guest member’s interactions all occur through their email inbox. They can’t access the group site but can receive calendar invitations, participate in email conversations and, if the admin has turned on the setting, they can open shared files using a link or attachment.
All group email messages and calendar invitations the guest receives will include a reminder to use Reply all in responses to the group, along with links to view group files and leave the group.

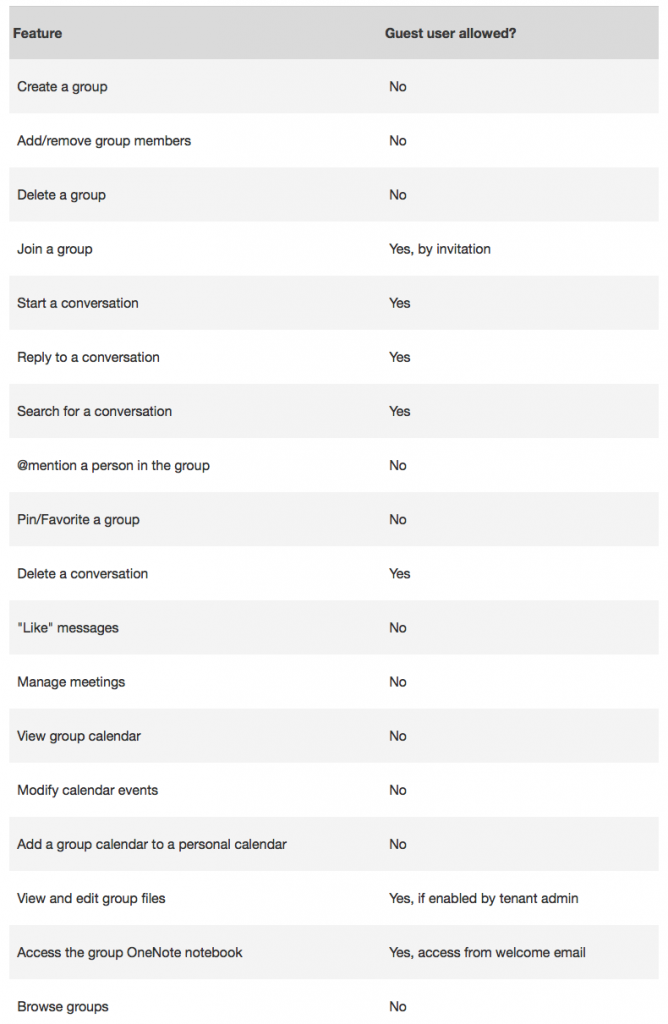
The following table summarises what guests can and can’t do.
